CJ's Cloud City...
Slimming Docker images with Multistage Dockerfiles and DockerSlim
2021-12-20

In this quick article, I’ll demonstrate some tips to help shrink the size of a Docker image by utilizing an Alpine version of a Node image for the base, multistages and DockerSlim to optimize the Alpine image.
The base project can be found in this repository.
Here’s our original Dockerfile:
FROM node:14

# Create app directory
WORKDIR /usr/src/app

# Install app dependencies
# A wildcard is used to ensure both package.json AND package-lock.json are copied
# where available (npm@5+)
COPY package*.json ./

RUN npm install

# Bundle app source
COPY . .

EXPOSE 8080
CMD [ "node", "app.js" ]
Let’s build the image: docker build -t node-app-1
Run docker images to check it has been built

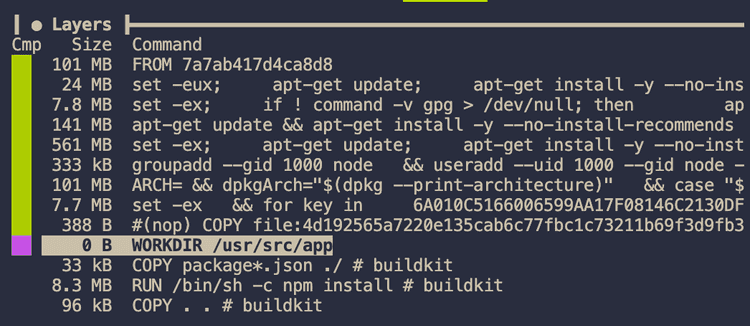
Now let’s use Dive to check the layers: dive node-app-1

The highlighted layer (with the purple square next to it) is our first command setting the working directory, each layer before that is the base image which is over 940mb!
Push to ECR and check vulnerabilities
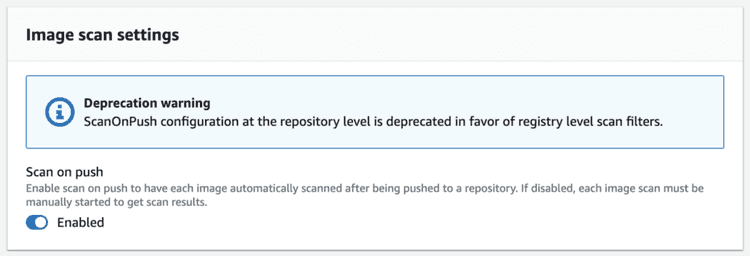
Create an ECR repo in AWS and enable “Scan on Push” while creating it.

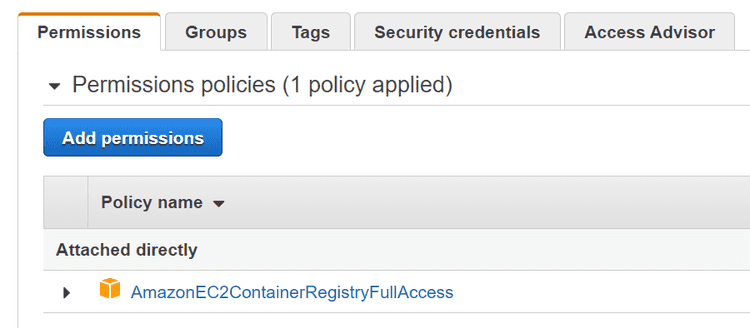
Make sure you have an IAM user with the AmazonEC2ContainerRegistryFullAccess AWS managed policy. Generate some Access Keys for this user and use the code below in your terminal, replacing the access key id and secret key with the ones you just generated.

export AWS_ACCESS_KEY_ID=AKIAXXXXXXXXXXXXXXXX
export AWS_SECRET_ACCESS_KEY=xxxxxxxxxxxxxxxxxxxxxxxxxxxxxxxxxxxxxxx
Log in to the ECR registry (replace the Account ID with your own, and use a different region if you wish): aws ecr get-login-password --region ap-southeast-2 | docker login --username AWS --password-stdin [ACCOUNT_ID].dkr.ecr.ap-southeast-2.amazonaws.com
Tag the image: docker tag node-app-1:latest [ACCOUNT_ID].dkr.ecr.ap-southeast-2.amazonaws.com/[ECR_NAME]:node-app-1
Push the image: docker push [ACCOUNT_ID].dkr.ecr.ap-southeast-2.amazonaws.com/[ECR_NAME]:node-app-1

AWS ECR will scan the image for CVE vulnerabilities once pushed. This node:14 image has hundreds of vulnerabilities, and even one “critical” vulnerability 😱.
Use an Alpine version of the image
Let’s change the base image from node:14 to node:14.18.2-alpine3.14. Alpine images are much smaller to begin with, and being more specific with the node and alpine versions. This is better for production, as it reduces the likelihood of the base image changing and breaking your app.
We will also use npm ci --only=production instead of npm install so that devDependencies are not installed. ci stands for “continuous integration” and uses the exact versions from the package-lock.json file.
The Dockerfile now looks like:
FROM node:14.18.2-alpine3.14

# Create app directory
WORKDIR /usr/src/app

# Install app dependencies
# A wildcard is used to ensure both package.json AND package-lock.json are copied
# where available (npm@5+)
COPY package*.json ./

# If you are building your code for production
RUN npm ci --only=production

# Bundle app source
COPY . .

EXPOSE 8080
CMD [ "node", "app.js" ]


Using dive we can see that the node-alpine base image is much smaller than the node image.

After pushing to ECR, we can also see that there is only one “low” vulnerability, much more secure than the node image we were using before.
Note: Normally we could patch this by adding something like RUN apk update && apk add musl && apk upgrade . However, the version of musl with the fix for this CVE is not in the latest alpine tags for the Node image.
Use a multistage Dockerfile
A multistage Dockerfile can be used to further reduce the size of the image.
FROM node:14 AS build

# Create app directory
WORKDIR /usr/src/app

# Install app dependencies
# A wildcard is used to ensure both package.json AND package-lock.json are copied
# where available (npm@5+)
COPY package*.json ./

# If you are building your code for production
RUN npm ci --only=production

# --- Prod ---
FROM node:14.18.2-alpine3.14 AS prod

EXPOSE 8080

# copy app folder from previous image
COPY --from=build /usr/src/app /usr/src/app

# Bundle app source
COPY . .

CMD [ "node", "app.js" ]
The first stage installs all the necessary node dependencies, using the node:14 image to demonstrate that it is not a part of our final build.
The second stage uses the Node Alpine image and copies the app directory from the first stage.


Using dive again, we can see that the base image is the same size, but the layers that we add are slightly smaller, saving nearly 2mb. This becomes much more apparent the bigger your Node.js project is.
Docker Slim
We can now use Docker Slim to shrink the image size even further.
Run docker-slim build node-app-3 in your terminal to build a smaller image with Docker Slim.


Our image is now just 80mb! 64% of the original size. We can also see Docker Slim has turned it into 1 layer. You can test out the image with docker run -p 8080:8080 node-app-3.slim and then visit to http://localhost:8080 in your browser to get the response “Hello World”.
Bonza 👌 — Hope this helped you!